As a relative newcomer to the industry, there’s a lot to learn about performing inspections but also managing your business. It’s important to take advantage of every break you can get because with finite time in the day, the more you can limit manual tasks, the more you can drive revenue.
To help you along the way, Palmtech’s built-in automation frees you up to book and complete more inspections. Today, we’re focused on automated agreements. Not only can you send them automatically, but the setup process is fast and easy with Palmtech. First, though, let’s review why they’re beneficial to inspectors looking to grow their business.
The benefits of automating inspection agreements
There’s no downside to automating agreements. When you consider the list below, it’s easy to see why it makes sense to put them on autopilot:
- Automatically send agreements to clients once you schedule the inspection
- Easily verify signed agreements in both the Palmtech web interface and the mobile app
- Enjoy more time to focus on inspections with less extra work collecting signatures
- Out-of-town buyers can sign agreements without being onsite
- Agreement placeholders can merge the information from the scheduled inspection
Finally, if you don’t have an agreement yet, there’s a default agreement pre-loaded that you can modify to your needs.
How to set up and send automated agreements
Whether you’re using the default agreement or a custom version, creating and managing inspection agreements is fast and easy in Palmtech. For a quick walkthrough, follow the steps below or watch this short video. You can even upload multiple versions and specify which services to apply to each one (more on this later).
Creating a new agreement
Step 1 – From the portal Dashboard, click your profile name and picture in the top right corner and select ‘Settings:’
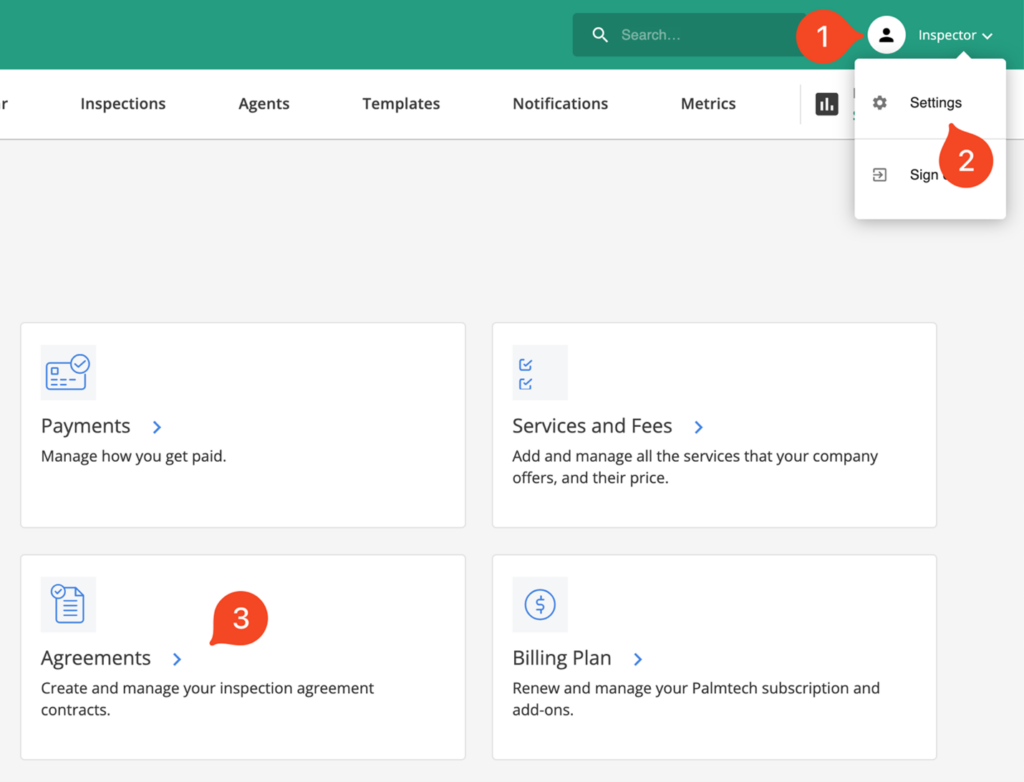
Step 2 – Within the ‘Account Settings’ view, click the ‘Agreements’
Note: If this is your first time using the Agreements feature, a new window will appear with a legal disclaimer for using Palmtech’s default agreement. To use the default agreement, read and accept the terms and conditions in the disclaimer.
Step 3 – Create a new agreement by clicking the green ‘Add new +’
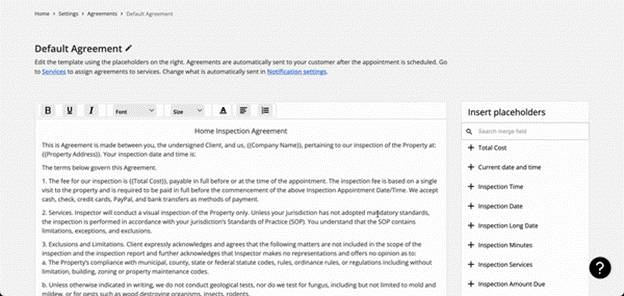
The agreement will be editable within the on-screen document editor. All the common text editing options are available such as bold text, font size and color, adding links, indentation, creating lists, and more. To read more about the document editor, read this user guide.
The ‘Insert placeholders’ window on the right allows you to quickly add placeholders to the agreement. Choose where you’d like to insert them in the document before clicking the placeholder. Read more about Placeholders here.
Editing an agreement
Step 1 – From the portal Dashboard, click your profile name and picture in the top right corner and then choose ‘Settings.’
Step 2 – Within the ‘Account Settings’ view, click the ‘Agreements’
Step 3 – Find the agreement you wish to edit and click its name or the editing pencil to the right of the screen.

Step 4 – Make your required changes to the agreement.
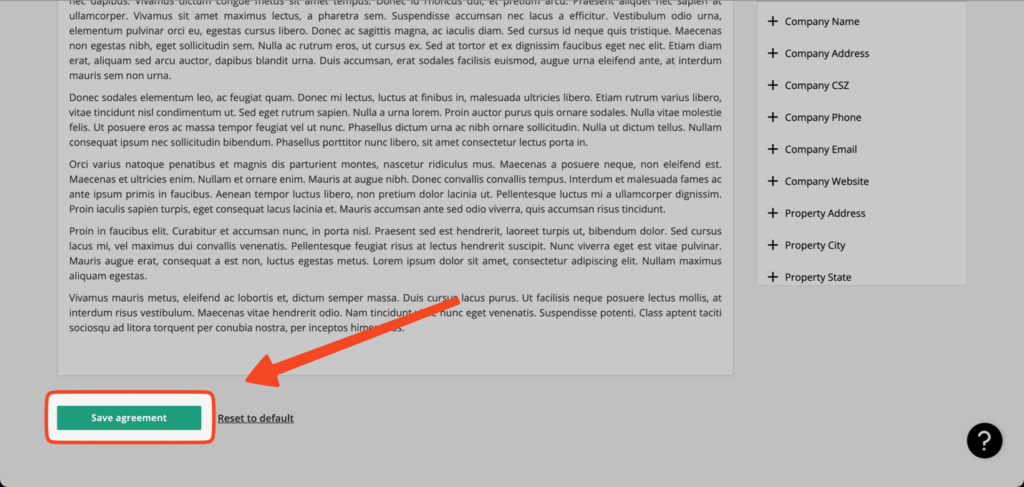
Step 5 – Once finished, click the green ‘Save agreement’ button at the bottom of the screen.
Deleting an agreement
Step 1 – From the portal Dashboard, click your profile name and picture in the top right corner and then choose ‘’
Step 2 – Within the ‘Account Settings’ view, click the ‘Agreements’
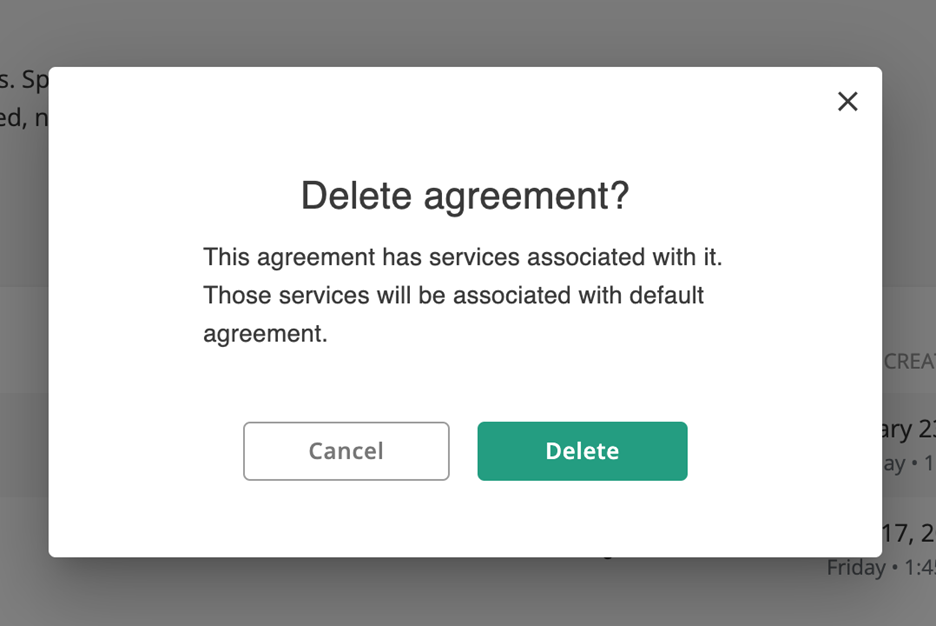
Step 3 – Find the agreement you wish to delete and click the trash canto the right of the screen.

Step 4 – Confirm your choice in the pop-up window that appears.
Assigning an agreement to a service
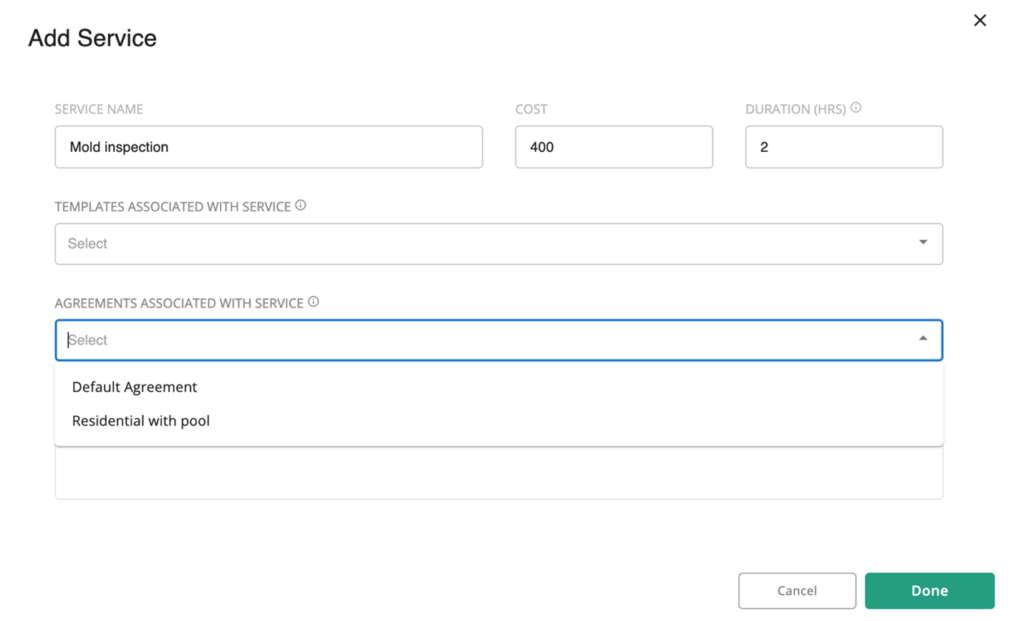
As we mentioned earlier, you can assign specific agreements to individual services when creating a new service. (Services are accessible within ‘Settings’ by selecting the ‘Services and fees’ option.)
At the ‘Add Service’ screen, use the ‘Agreements associated with this service’ drop-down option to select the default agreement of your choosing.
Agreement notifications
The steps you’ve already taken, like setting up the agreements and tying them to services, are a great start. Now, get ready to take it to the next level with hands-free email notifications to your customers! Agreements can be sent automatically using the ‘Notifications’ section of the portal. To learn more about managing automated notifications, visit the guide.
Try out automated agreements today
When you can automate everyday business tasks, there’s no telling how much time you’ll save running your business. Take automated agreements for a spin on your next scheduled inspection and you’ll see why it’s a game-changer to free up more time throughout your day.
