
If there’s an unsung hero in the Palmtech platform, it just might be templates and the template library. Templates are life savers out in the field because they save you time doing all your inspections—mold, radon, roof, condo, commercial, you name it. That said, it’s one thing to have a variety of templates available, but to truly get full value out of them, they’ve got to be editable.
Good news for you then because Palmtech’s templates ARE customizable, and today we’re going to show you how to modify them quickly and easily. Before we get into the how-to section, though, let’s dive into how customizing your templates can save you time and make you more efficient.
The benefits to customizing home inspection templates
- Rearrange templates in the order you inspect
You likely have a preferred sequence when doing inspections. Maybe you start indoors with the kitchen or garage before moving on to the exterior of the house. Maybe you begin with the roof and foundation before moving indoors. Either way, Palmtech makes it easy for you to customize templates to better reflect the way you conduct an inspection. Whichever order you like best, you’ll save time by not having to skip around from one section of the report to another. That means fewer taps, less searching and navigation, and a faster report writing process.
- Templates can be adjusted and saved
Once you have a template just the way you want it, save it to reuse next time! The order and settings you select will remain intact each time you open the template for a new inspection. You only have to do adjust a particular template once! If for any reason you need to change the template again, that’s easy to do as well.
- Create a template with pre-filled information to save time
Just as you can customize templates based on your preferred sequence, you can also create templates with pre-filled details that will be used for each inspection. These pre-defined options fall under three areas: Template Categories (e.g. lines, additional inputs, comments), Template Lines (e.g. descriptions, media, locations, informational text, comments), and Ratings (e.g. name, definition, include in summary, color). There’s more details on these in the how-to section below, but once you’ve selected your inputs, make sure to save it for next time and that’s it!
- Stay organized and save even more time with default ratings
There are two benefits with default ratings. First, pre-assigning ratings helps keep your comments organized by ensuring the appropriate rating is always attached. Second, when setting up default ratings through the Template Editor, each time you select a comment the rating is automatically entered for you, saving you time and reducing extra clicks. This feature is especially useful for comments that consistently receive the same rating, so there’s less manual work selecting the rating each time.
How to customize templates in Palmtech
Once you’ve created a new template, follow the steps below to customize it to your liking.
Adding new categories
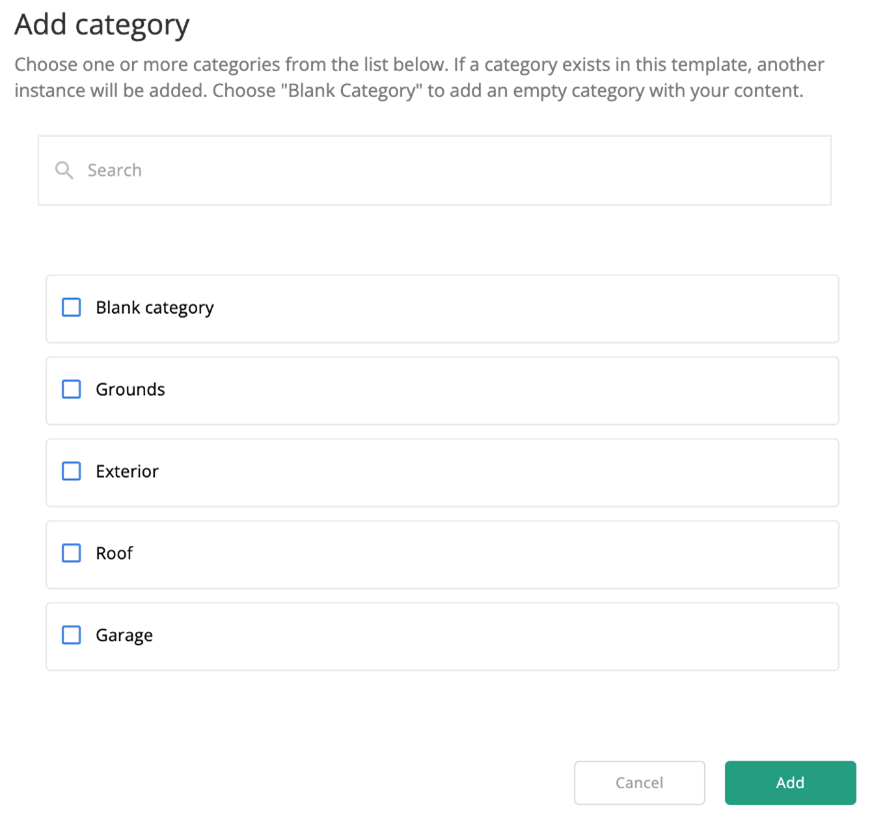
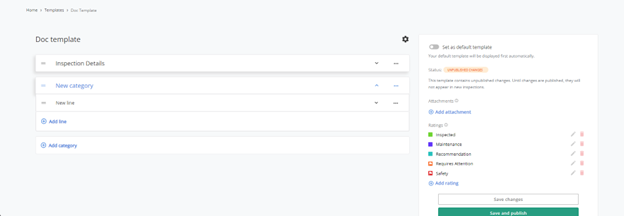
- Click the blue + Add category button to add a new category.
- A new Add category window appears asking you to select from a sample category which contains predefined options such as lines, additional inputs, and comments. To create a brand-new category, the Blank category option should be selected. Once a category option is selected, click the green Add button to continue.
- The template editor window will reappear and now includes the newly created category.
- The category can be renamed to anything you like as long as no slashes ( / ) are used.
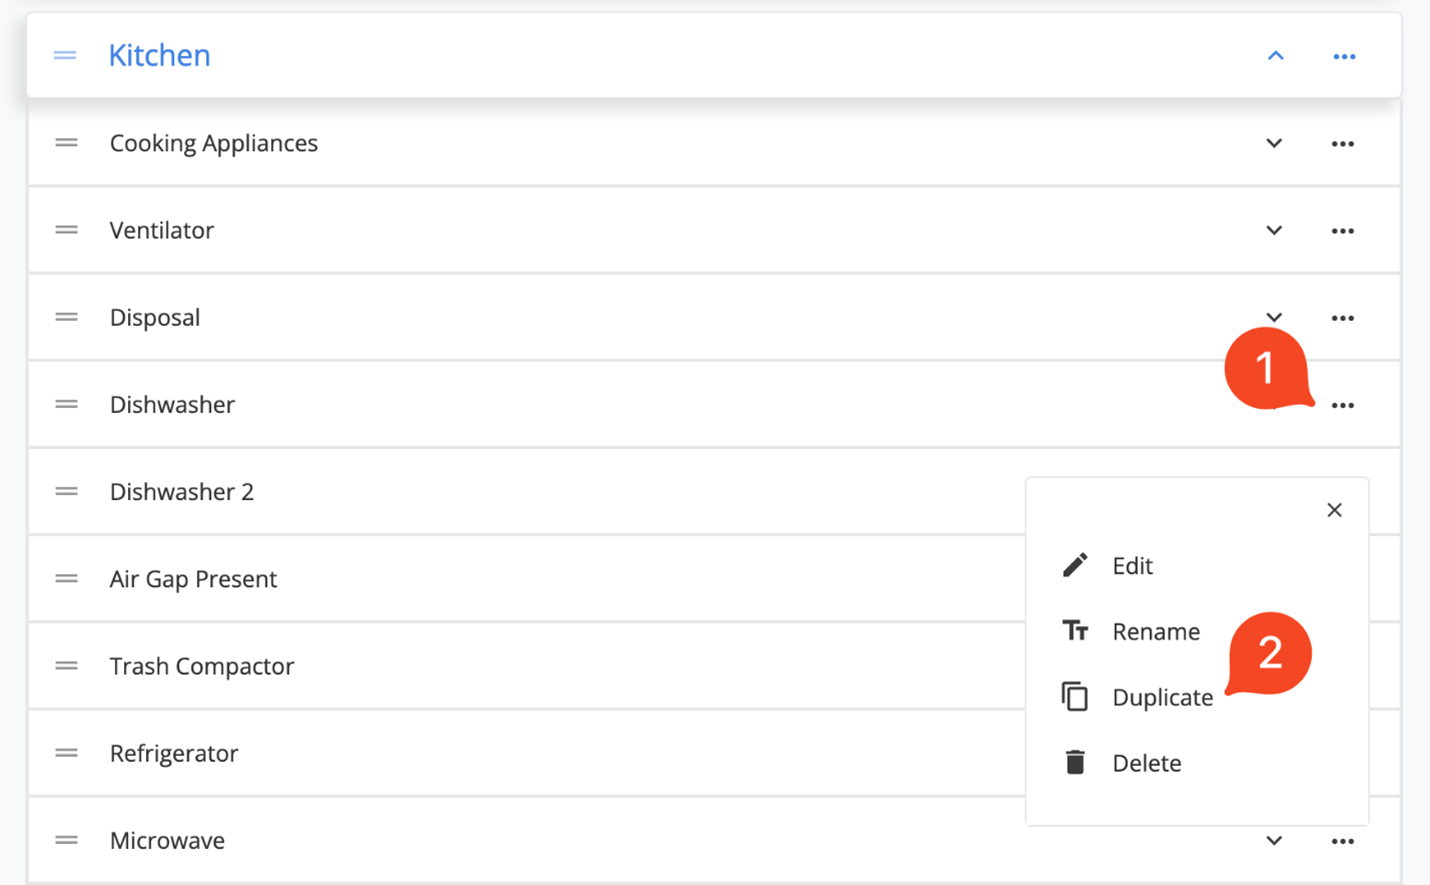
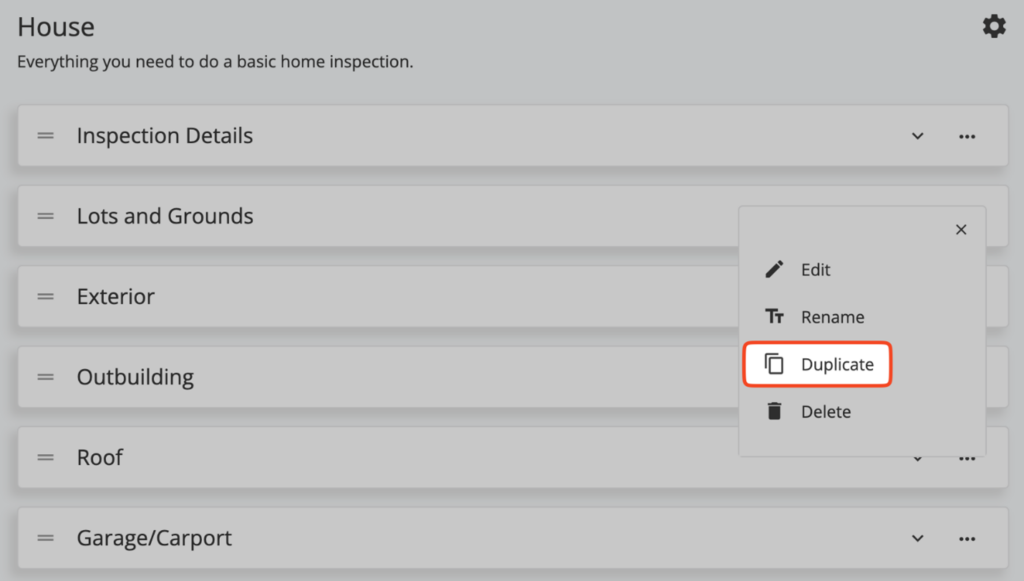
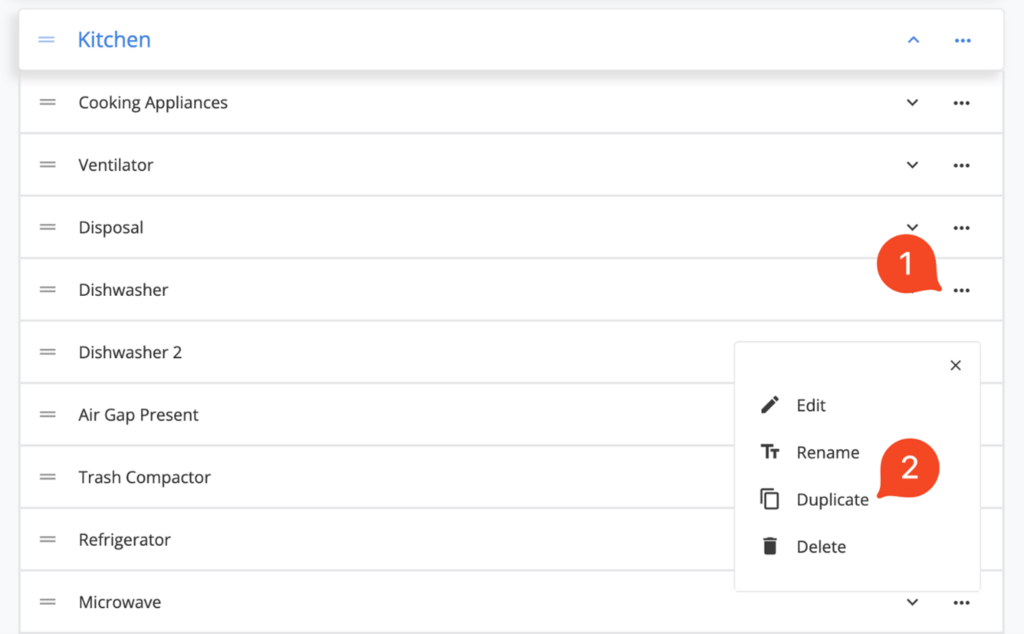
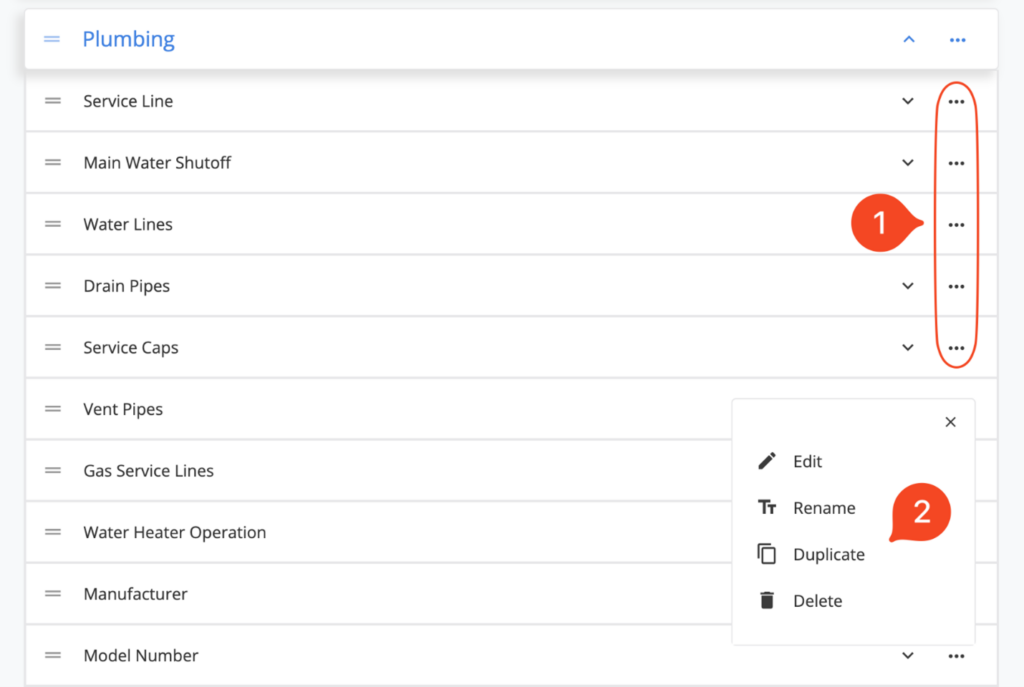
Duplicate categories
Palmtech now allows for entire categories to be easily duplicated in less than three clicks.
Navigate to the category you wish to duplicate, click/tap the ellipsis (•••) button and select the Duplicate option. An exact copy of the category will be created and can be modified as needed.
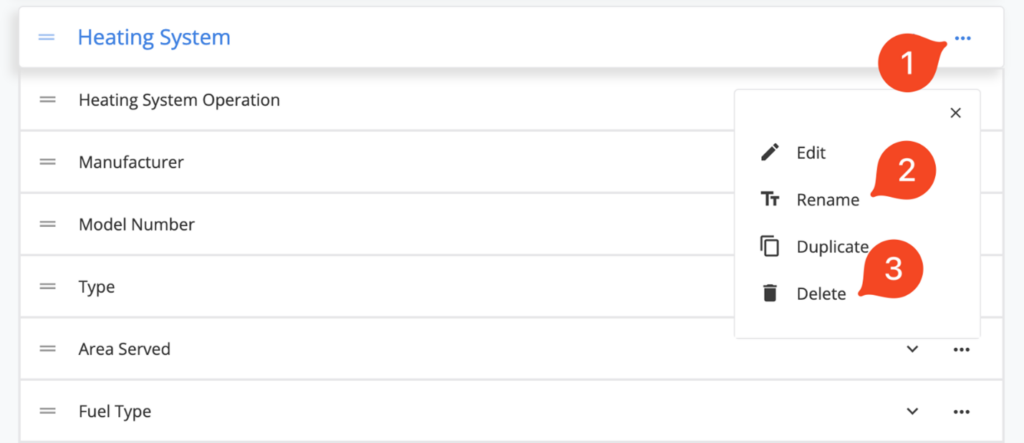
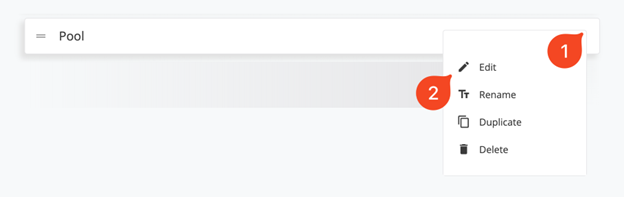
Deleting and renaming categories
To delete or rename a category, click the same ellipsis (•••) button and select the Rename or Delete option, respectively, within the menu that appears. Note: Deleting a category also deletes every line and sub-section within it.
Rearranging categories
You can also rearrange categories by dragging and dropping the item you want to move to its new location.

Template lines
Lines can be heavily customized to be comprehensive or concise and can have descriptions, media, locations, informational text, and comments. You can customize the choices available for these as well as pre-select items so that with each new inspection, some items are already completed. However, when creating a new line, it only requires a name to be considered valid.
Adding new lines
Lines are added within categories and are added to templates using the blue + Add line button.
Duplicate lines (new to Palmtech!)
Just like categories, lines can be easily duplicated in just a few clicks/taps.
Navigate to the line you need to duplicate, click/tap the ellipsis (•••) button and select the Duplicate option. An exact copy of the line will be created and can be modified as needed.
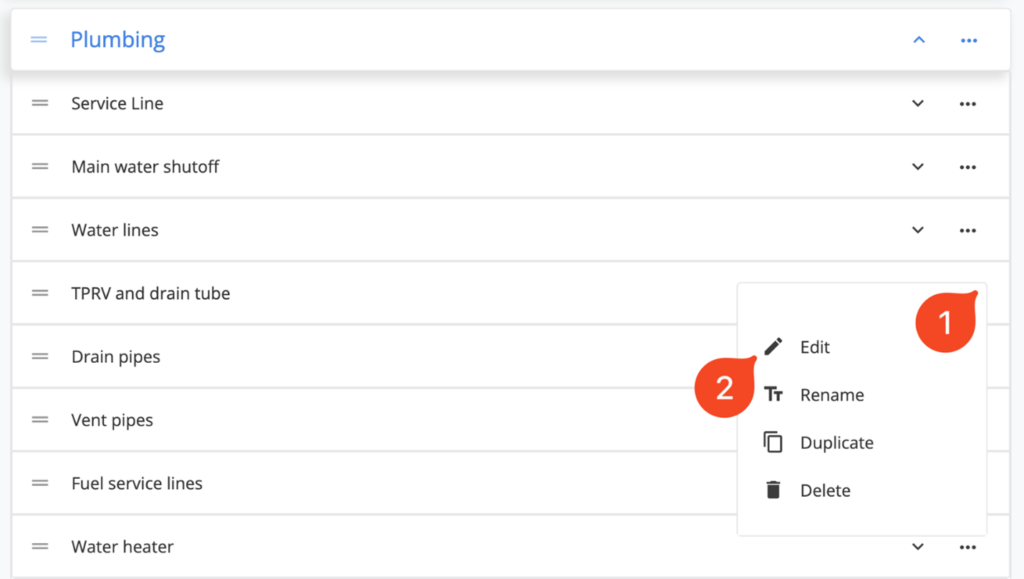
Deleting and renaming lines
The process of deleting or renaming lines is just as quick and easy.
To delete or rename a line, click the ellipsis (•••) button for the line you wish to change and select the Delete or Rename option respectively within the menu that appears.
Rearranging lines
To rearrange lines in a new order, drag and drop the item you want to move to its new location. However, lines can’t be moved from one category to another, they can only be moved within its parent category.
Optional lines and categories
Categories and lines can both be set as optional inside templates using the Template Editor. When a category or line is marked as optional, it won’t appear in the default list when you start an inspection with the template, but it will be readily available to add in. This optional setting is mostly used for categories or lines that you need on occasion, but don’t want included in every inspection.
Marking a category as optional
To set a category as optional click the ellipsis (•••) button for the category you wish to modify, then select the Edit option.
Within the Edit menu, select the Optional setting.
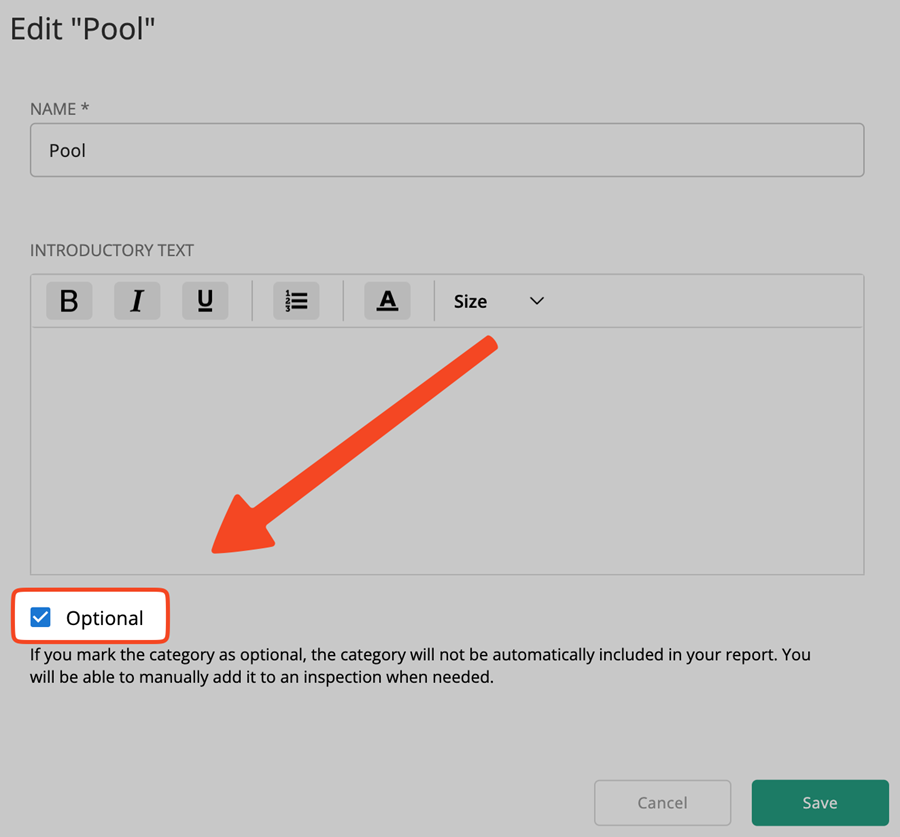
Once the category has been marked as Optional, it will show an eye with a strikethrough.

Marking a line as optional
Like categories, lines can also be set as optional. An optional category may contain optional lines if required.
To set a line as optional click the ellipsis (•••) button for the line you wish to modify, then select the Edit option.
Within the Edit menu, select the Optional setting to mark the line as optional.
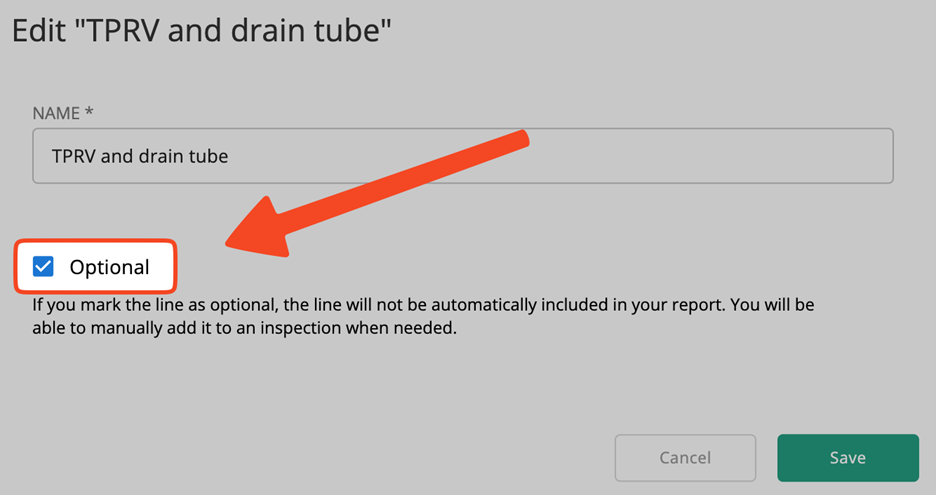
Same as before, once the line has been marked as Optional, the line will show an eye with a strikethrough.

Using optional items in an inspection
Categories and lines marked as optional can be used during inspections when adding a new category or line.
Adding an optional category
While performing an inspection, tap the blue + Category button at the bottom of the Category list.
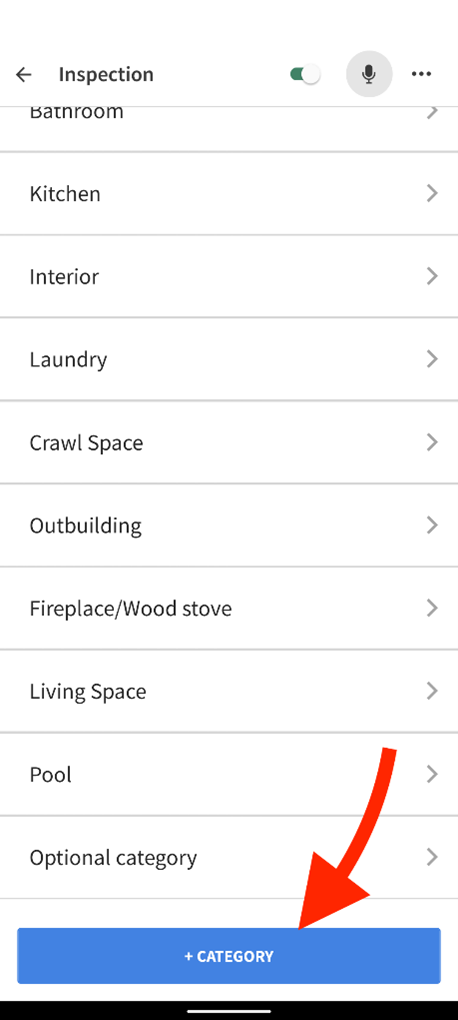
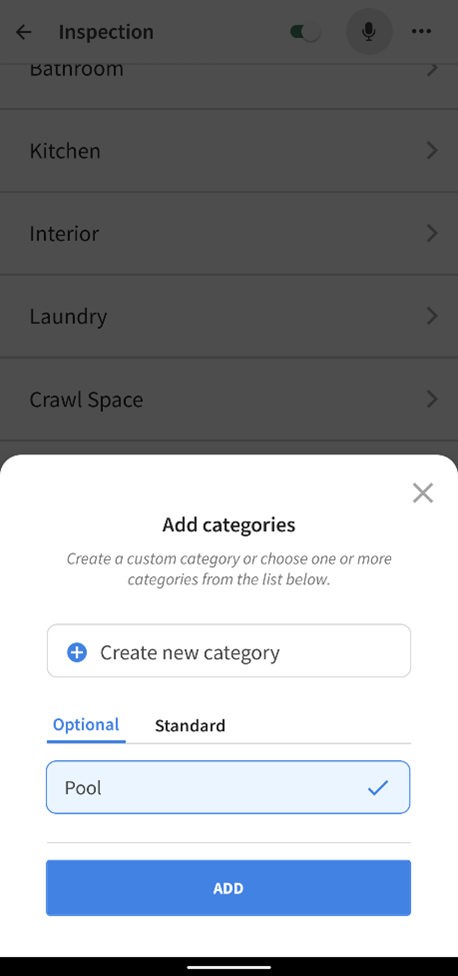
After tapping the + Category button, a new menu will appear which lets you select from Optional or Standard categories. Here you can find the categories which have been marked as optional. Tap the category you want to add to your inspection and then tap the blue Add button.
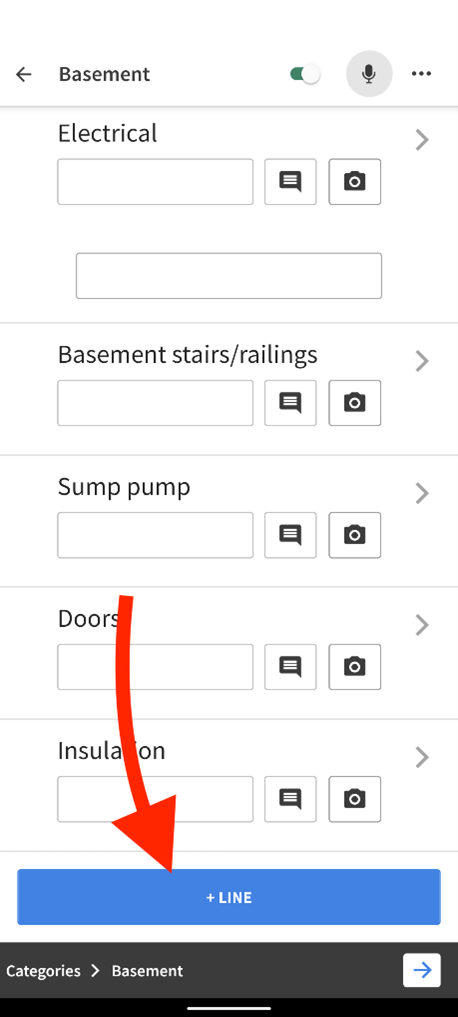
Adding an optional line
While performing an inspection, tap the blue + Line button at the bottom of a Category.
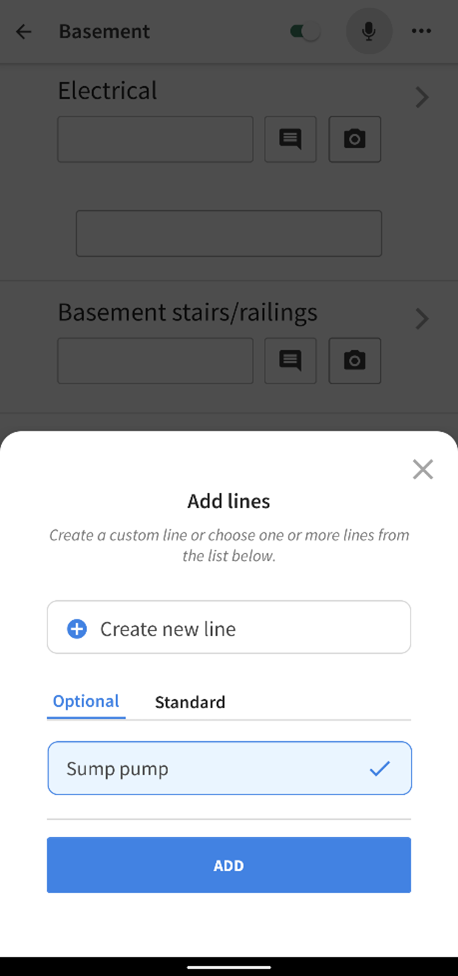
Choose from the list of optional lines available for this category, tap it, and then tap the blue Add button.
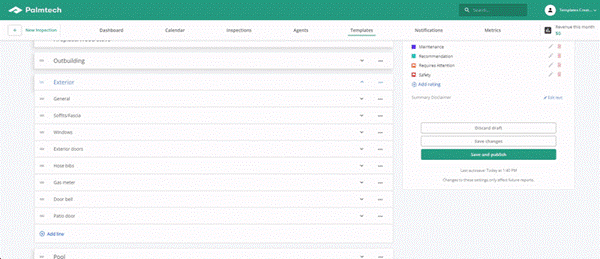
Edit template settings
The options chosen for the template when it was created can be modified using the Edit template settings button, which is shaped like a mechanical gear next to the template name.
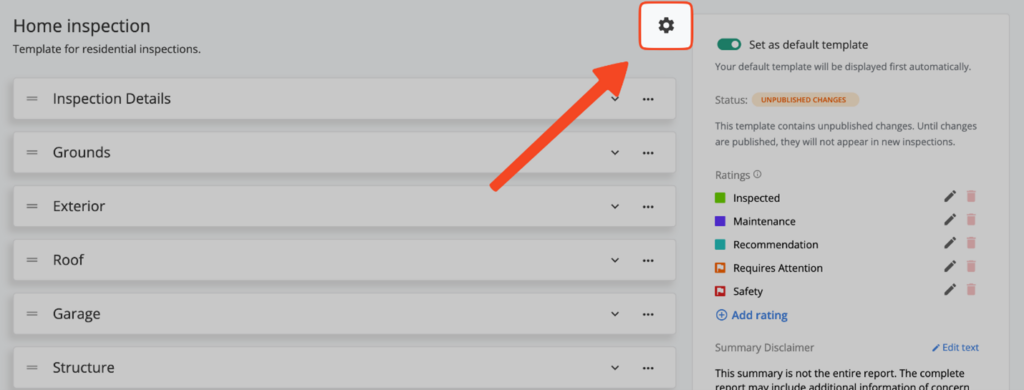
Settings such as the Type of Inspection or its Description can be modified from this screen. You can also delete the template altogether here as well.

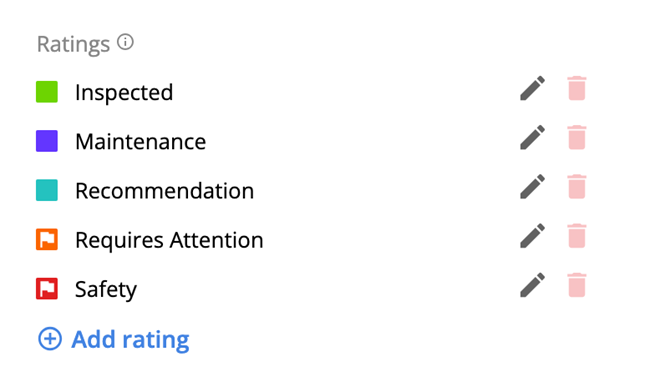
Ratings
Templates include a set of default ratings, which can be customized in several ways. New ratings can be added, and existing ratings can be deleted or edited as well.
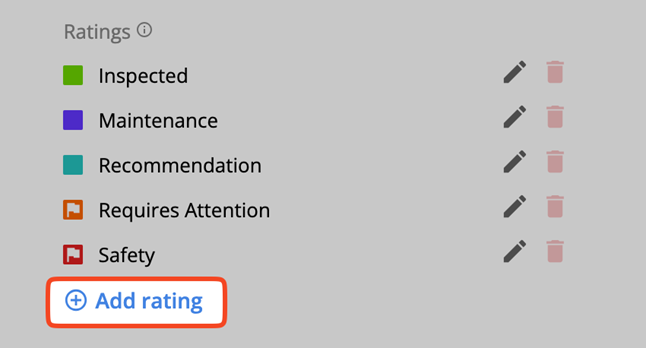
Adding new ratings
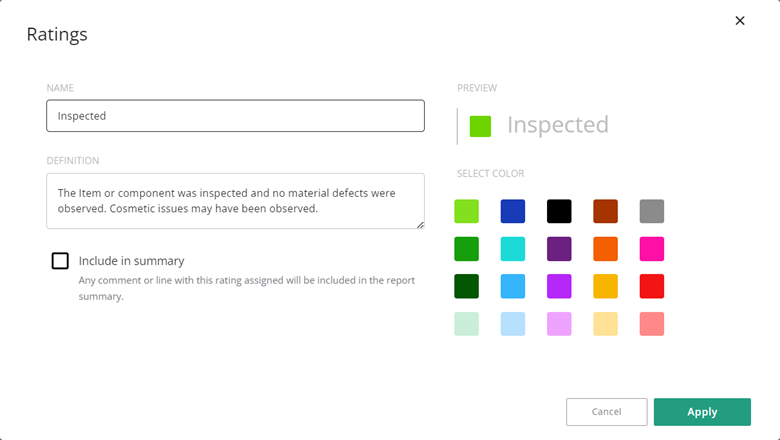
New ratings can be added to a template using the blue Add rating button.
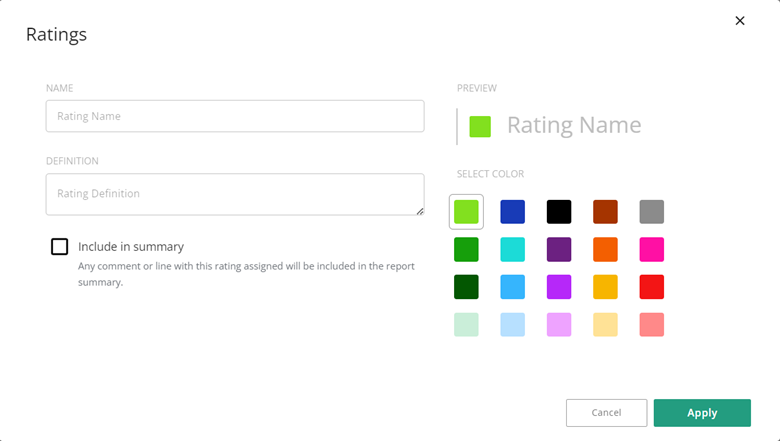
Choose a name for the rating, provide a definition, and select a color. The Include in summary option lets you flag the rating so it always shows up in the inspection summary. Once your rating is complete, press the green Apply button in the bottom right corner of the window.
Editing or delete existing ratings
To edit an existing rating, click the Edit button (pencil icon) for the rating you wish to modify. Make your desired changes and then use the green Apply button to save them. To delete a rating, click the Delete button (red trash can icon) next to the rating.

Anatomy of a rating
- Name is what appears in the report to demonstrate the rating
- Definition is a detailed explanation of what the rating means
- Include in summary is the option to make sure the rating being edited always shows up in the report summary. A great example is any rating that may be critical or requires high visibility. Ratings with this option turned on will show a flag symbol.
- Preview provides a quick glance at how the rating will appear in the report
- Select Color lets you choose from a variety of colors to go along with the rating
Setting up automatic ratings
In Palmtech, ratings are attached to comments and not entire lines, allowing you more control. To learn how to have ratings appear automatically depending on the comment, visit this article (requires Palmtech login).
Have you customized your inspection templates yet?
We’ve covered a lot today, but these in-depth steps empower you to customize templates any way you want! And remember, you only have to customize a template once to experience their true power. Try customizing your templates today so that your next inspection and report writing process goes even faster!